The right piano for your apartment is less about a headphone jack and more about the physics of touch, sound transmission, and environmental stability.
- An acoustic piano’s greatest challenge isn’t volume—it’s the structural vibration that travels through floors and its vulnerability to apartment heating systems.
- A digital piano’s success depends on its mechanical fidelity (key weight) and your ability to create a realistic acoustic environment with speaker placement.
Recommendation: Before choosing a piano, audit your apartment’s structure, humidity, and your relationship with your neighbors. The logistical constraints will reveal the correct technical choice for you.
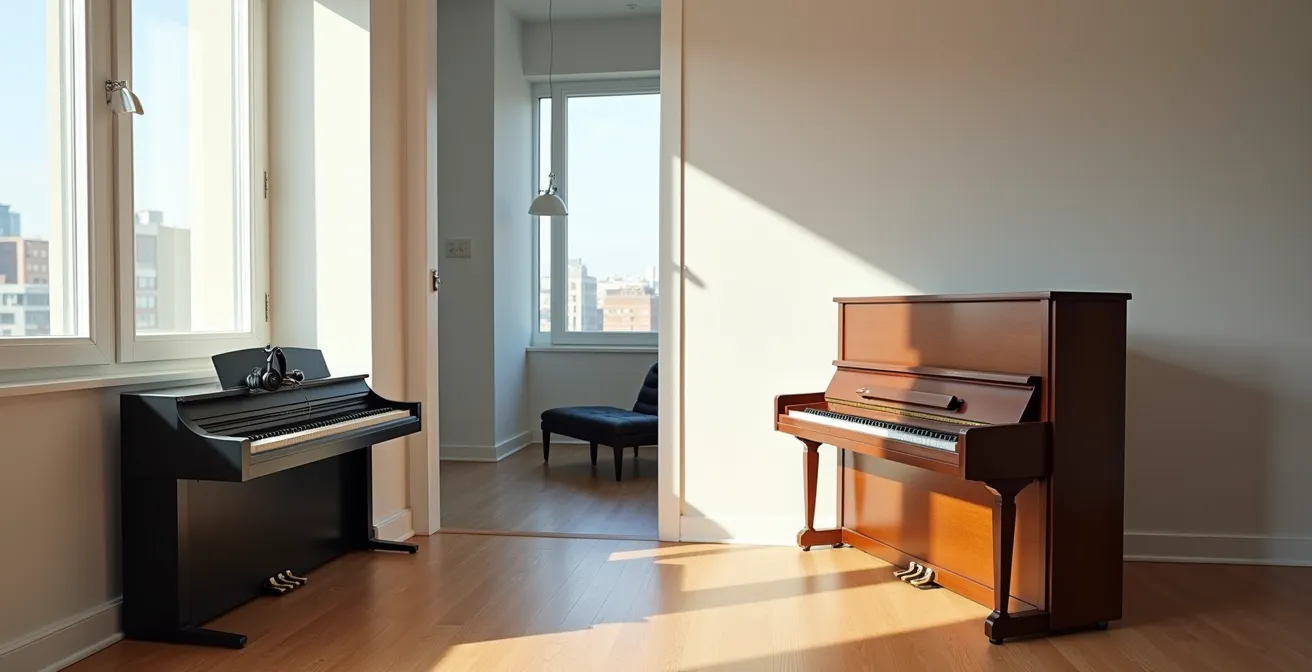
The dream of having a piano in your apartment often collides with a harsh reality: limited space, thin walls, and neighbors. The default debate immediately pivots to the obvious: the silence of a digital piano’s headphones versus the “real” feel and sound of an acoustic upright. While this is a valid starting point, it barely scratches the surface of the technical and logistical challenges at play. As a piano technician, I see the aftermath of choices based on this simple dichotomy—frustrated players with instruments that are fundamentally mismatched to their environment.
The discussion should not be about which is “better,” but which is the superior engineering solution for a constrained space. This means moving beyond the headphone jack and examining the mechanics of the instruments themselves. We need to talk about the physics of a weighted key action, the science of sound generation and transmission, and the constant battle against the environmental instability of a centrally-heated apartment building. The true cost of an acoustic piano isn’t just its price and tuning; it’s the constant management of its physical state. The true challenge of a digital piano isn’t just its “fakeness,” but the technical knowledge required to make it sound and feel authentic within your four walls.
This guide will dissect the choice from a technician’s perspective. We will analyze the critical components—from key mechanisms and sound engines to the misunderstood science of soundproofing—to provide a pragmatic framework for your decision. We will explore why some technologies succeed and others fail in an apartment setting, enabling you to make an informed choice based on mechanics, not just marketing.
Summary: Digital Piano vs Acoustic Upright: A Technician’s Guide for Apartment Dwellers
- Why Is Learning on Unweighted Keys a Waste of Time?
- How to Protect Your Acoustic Piano From Humidity Damage in Winter?
- Sampled vs Modeled Sound: Which Digital Engine Feels More Real?
- The Polyphony Mistake That Cuts Off Your Notes During Complex Pieces
- How to Position Digital Piano Speakers for Realistic Resonance?
- Why Do Soundproofing Foam Panels Fail to Stop Drum Noise?
- How to Properly Use a Case Humidifier Without Over-Watering?
- How to Start Listening to Jazz Without Feeling Intellectually Overwhelmed?
Why Is Learning on Unweighted Keys a Waste of Time?
The single most critical component in the transition from desire to skill is the physical interface: the keys. For an apartment dweller, the allure of a cheap, lightweight, 61-key “keyboard” is strong. This is a trap. Learning on unweighted or semi-weighted keys is not just a compromise; it actively builds bad habits that are difficult to unlearn. An acoustic piano’s action is a system of levers and hammers with physical weight. Playing it requires developing fine motor control and finger strength. Unweighted keys offer no resistance, promoting a flat, weak technique that will not translate to an acoustic instrument.
This is where the concept of mechanical fidelity becomes paramount. A good digital piano’s primary job is to replicate the physical experience of an acoustic. The recent 23% increase in digital piano sales since 2020 shows a market shift towards models that prioritize this feel. The goal is to build muscle memory that is transferable. When you press a key on a graded hammer action keyboard, you are fighting a similar weight and leverage as you would on an acoustic grand, with bass notes feeling slightly heavier than treble notes.
Understanding the different types of key actions is crucial. A simple keyboard feels the same on every key, while a sophisticated digital piano emulates the complex mechanics of a real piano action.
| Action Type | Feel & Response | Best For | Price Range |
|---|---|---|---|
| Graded Hammer Action | Heavier bass, lighter treble | Classical training | $800-1500 |
| Wooden Key Hybrids | Closest to acoustic feel | Advanced players | $1500-3000 |
| Escapement Simulation | Subtle ‘let-off’ feel | Professional use | $2000+ |
Choosing a digital piano with a fully weighted, 88-key graded hammer action is the minimum viable specification for anyone serious about learning piano. Anything less is not a piano; it is a toy that will hinder your progress in the long run.
How to Protect Your Acoustic Piano From Humidity Damage in Winter?
If you’re considering an acoustic upright, your biggest enemy isn’t your neighbor; it’s your building’s HVAC system. An acoustic piano is a living thing, made primarily of wood, felt, and metal. Its soundboard—the large wooden diaphragm that amplifies the string vibrations—is exquisitely sensitive to changes in humidity. In winter, central heating systems dry out the air, causing the wood to shrink. This can lead to a drop in string tension (making the piano go flat), cracks in the soundboard, and loose tuning pins. In summer, high humidity causes the wood to swell, leading to sticking keys and potential rust on the strings.
The ideal humidity for a piano is a stable 42-45%. Maintaining this in an apartment is a significant challenge. You must invest in a good digital hygrometer and be prepared to actively manage your room’s environment with humidifiers in the winter and dehumidifiers in the summer. This is not a “set and forget” task. It’s a constant battle against the environment your building imposes on you. This is before you even consider the logistics of getting the instrument into your apartment; most upright pianos weigh between 300-500 pounds (135-225 kg), a major consideration for movers and floor loading.
For those committed to an acoustic instrument in an apartment, the most robust solution is a professionally installed Piano Life Saver system, often made by Dampp-Chaser. This is a small, internal climate control system that consists of a humidifier, a dehumidifier, and a humidistat installed directly inside the piano. It creates a stable micro-environment around the soundboard and action, protecting the instrument from the wider fluctuations of the room. While effective, it’s an additional cost (both for installation and maintenance) and requires a power source. It is the price of keeping a delicate organic machine alive in an artificial environment.
Sampled vs Modeled Sound: Which Digital Engine Feels More Real?
The “soul” of a digital piano resides in its sound engine—the technology that generates the tone when you press a key. This is the heart of the “real vs. fake” debate, and it boils down to two main philosophies: sampling and modeling. Understanding the difference is key to knowing what you’re listening for. Sampling is like taking a high-resolution photograph. Engineers record a pristine concert grand piano, note by note, at various volumes. When you play, the digital piano triggers these recordings. The quality depends on the source piano and the depth of the sampling (how many velocity layers were recorded per note).
Modeling, on the other hand, is like creating a 3D computer model of a piano. Instead of playing back a recording, the processor calculates the sound in real-time based on physical principles: the hammer hitting the string, the string vibrating, the soundboard resonating, the sympathetic vibrations of other strings. This creates an infinitely variable sound that responds dynamically to your playing in a way that static samples cannot.

While high-end sampling is incredibly realistic for the initial note attack, modeling often excels in capturing the complex interplay of resonance and decay that happens when you use the pedal or play complex passages. The sound is not just a collection of individual notes, but a holistic, resonant system.
Case Study: Roland’s SuperNATURAL vs. Yamaha’s CFX Sampling
This philosophical divide is clear in the market. Roland’s SuperNATURAL sound engine, a hybrid approach that leans heavily on physical modeling, is lauded for its responsiveness and the way notes connect and decay organically. Conversely, Yamaha’s flagship digital pianos often feature their CFX sampling, which meticulously captures recordings of their own world-class CFX concert grand. As noted in professional reviews, Roland’s modeling can feel more “alive” and responsive to nuanced playing, while Yamaha’s sampling delivers a “photographically accurate” and powerful initial sound that is undeniably beautiful. The choice depends on whether you prioritize dynamic responsiveness or the pristine quality of the initial tone.
The Polyphony Mistake That Cuts Off Your Notes During Complex Pieces
Polyphony is one of the most misunderstood specifications in the digital piano world, yet it has a direct impact on the realism of your playing experience, especially in an apartment where you might rely heavily on the internal sound. In technical terms, polyphony is the number of individual notes a digital piano can produce simultaneously. An entry-level keyboard might have 32-note polyphony, while a high-end instrument can have 256 or more. You might think, “I only have ten fingers, so why would I need more than 10 notes of polyphony?”
This thinking overlooks two critical factors. First, many digital piano sounds are stereo, meaning a single note can use two voices of polyphony. Second, and most importantly, is the sustain pedal. When you hold down the sustain pedal, every note you play continues to ring out, each one consuming a voice of polyphony. If you play a rapid, complex passage or a large chord with the pedal down, a low-polyphony piano will be forced to “steal” the earliest notes to make room for the new ones. This results in notes abruptly cutting off, creating a choppy and unnatural sound that completely breaks the illusion.
For this reason, professional pianists recommend at least 128+ voices minimum for any serious playing. This provides enough headroom for complex classical pieces or dense jazz chords with heavy pedal usage. However, the number alone isn’t the whole story. As one technical analysis points out, the software that manages polyphony is just as important:
The quality of the ‘note-stealing algorithm’ is often more important for a clean sound than the maximum polyphony number itself.
– Digital Piano Review Guide, 2024 Digital Piano Technical Analysis
This means that a well-designed 128-note polyphony system might sound cleaner than a poorly implemented 256-note system. The algorithm determines which notes to cut off first (ideally the quietest and oldest ones) to make the process as inaudible as possible. When shopping, 128-note polyphony should be your absolute minimum, but also be sure to test the instrument by playing fast arpeggios with the sustain pedal held down to hear how gracefully it handles the limit.
How to Position Digital Piano Speakers for Realistic Resonance?
One of the great advantages of an acoustic piano is that the sound emanates from a large, resonant object, filling the room naturally. A digital piano, by contrast, typically pushes sound through two to four small speakers. This can create a sound that feels localized and “in front” of you, rather than surrounding you. For an apartment dweller, creating a convincing acoustic environment for your digital piano is a crucial final step. The room itself becomes part of the instrument.
Speaker quality and placement on the piano chassis are vital. Look for instruments where the speakers are not just pointing up or down, but are positioned to mimic how sound radiates from a real piano. Some models have speakers near the keyboard, under the top lid, and near the floor to replicate the projection of an upright. However, even the best internal speaker system can be ruined by poor room placement. Pushing the piano right against a wall can create a boomy, muddy sound. Placing it in a corner can cause an unnatural buildup of bass frequencies.
The solution is to treat your digital piano like a piece of high-fidelity audio equipment. Positioning it 6-12 inches from a wall allows sound to reflect and create a sense of depth without becoming trapped. Placing a thick area rug underneath the piano and pedal unit can absorb unwanted floor reflections and reduce vibrations, improving clarity. For more advanced setups, placing acoustic panels on the walls at the “first reflection points” (the points where sound from the speakers would bounce before reaching your ears) can tame harsh echoes and create a more controlled, pleasant listening environment. This isn’t about soundproofing for your neighbors; it’s about sound treatment for your own enjoyment, transforming a direct, sterile sound into an immersive acoustic experience.
Why Do Soundproofing Foam Panels Fail to Stop Drum Noise?
This is the most critical and misunderstood issue for apartment musicians. You decide on an acoustic piano, and to be a good neighbor, you buy a case of acoustic foam panels to put on the wall. Your neighbor downstairs still complains. Why? Because you’ve addressed the wrong problem. Acoustic foam is designed to absorb mid-to-high frequency airborne sound, reducing echo and reverberation *within a room*. It does almost nothing to stop the transmission of low-frequency sound and structural vibrations.
The “thump” of a piano—whether it’s the percussive attack of the hammers or the low-frequency resonance of the bass notes—doesn’t just travel through the air. It travels through the body of the piano, into your floor, and through the building’s structure directly into your neighbor’s ceiling. This is called structural transmission, and it’s far more invasive than airborne noise. The same applies to a digital piano; even if you’re using headphones, the physical act of the weighted keys bottoming out can create a percussive “thud” that travels through the floor. The piano’s weight is also a factor, as modern apartment floors can typically support 500-1000 pounds safely distributed, but this weight helps couple the instrument to the structure.
The only effective solution is decoupling—physically isolating the piano from the floor. This prevents vibrations from entering the building’s structure.
Building a DIY Piano Isolation Platform
A proven and cost-effective method is to build a “piano riser” or isolation platform. One successful case involved apartment dwellers who constructed a platform using layers of MDF (medium-density fiberboard) and a damping compound like Green Glue, resting the entire platform on heavy-duty rubber isolation pads. This simple construction effectively decouples the piano from the floor, and they reported a 70% reduction in vibration transmission to the neighbors below for a total cost under $200. This approach addresses the root cause of the noise complaint: the structural, not the airborne, sound.
Your Apartment Piano Pre-Purchase Audit
- Structural Sound Check: Have a friend walk and stomp in the spot where the piano will go while you listen from the apartment below (if possible). This reveals how easily impact noise travels through your floor.
- Humidity Baseline: Place a digital hygrometer in the intended room for one week. Record the highs and lows to understand the stability of your apartment’s environment before introducing a sensitive wooden instrument.
- Neighbor Introduction: Talk to your immediate neighbors (below, above, and adjacent) *before* you buy. Explain your plans and establish a friendly line of communication. It’s much easier than a first introduction via a noise complaint.
- Path of Entry: Measure every doorway, hallway, corner, and elevator from the street to the final location. Compare these measurements against the dimensions of the piano (crated and uncrated).
- Floor Load Inquiry: For acoustic pianos, contact your building management and inquire about floor load capacity specifications for your unit. It’s better to be safe than sorry.
How to Properly Use a Case Humidifier Without Over-Watering?
For acoustic piano owners in apartments, the temptation to use small, targeted humidity solutions like guitar case humidifiers can be strong. The logic seems sound: why humidify an entire room when you only need to protect the instrument? However, this approach is fraught with risk. An upright piano is a large, open system, unlike a sealed guitar case. A small case humidifier, such as a gel pack or sponge, is unlikely to have enough capacity to regulate the humidity of the entire soundboard and action. Worse, improper placement can lead to disaster.
The cardinal rule of piano humidification is to avoid direct contact with water. Placing a damp sponge or a leaky humidifier directly on the wooden pinblock or near the soundboard can cause localized swelling, warping, and rust on the strings or tuning pins. This damage can be far more costly to repair than the effects of general dryness. Piano experts are clear: keep the humidity between 42-45%, but achieve it through whole-room control or a dedicated system like a Dampp-Chaser. Using ad-hoc solutions is a gamble.
You must be vigilant for signs of humidity damage, which can be subtle at first. If you notice sticky or sluggish keys, that’s often a sign of felt and wood parts swelling from excess moisture. If you see condensation or small spots of rust forming on the strings, you have a serious problem that requires immediate attention. A musty smell coming from inside the piano can indicate mold growth, a worst-case scenario. The best defense is a good offense: a digital hygrometer placed near the piano will give you the objective data you need to act before these symptoms appear, allowing you to adjust your room’s humidifier or dehumidifier proactively.
Key Takeaways
- The primary choice for apartment living is a trade-off: an acoustic’s organic complexity versus a digital’s environmental control.
- For acoustics, success is defined by your ability to manage humidity and decouple the instrument from the building structure.
- For digitals, success is defined by choosing superior mechanical fidelity (weighted keys) and optimizing your room’s acoustics for the speakers.
How to Start Listening to Jazz Without Feeling Intellectually Overwhelmed?
After navigating the complex technical decisions of mechanics, humidity, and acoustics, we arrive at the ultimate goal: making music. For many aspiring pianists, jazz represents a pinnacle of improvisational and harmonic freedom, but also a seemingly impenetrable wall of theory. The piano, whether digital or acoustic, is the perfect tool to break down this wall, not by intellectualizing, but by doing.
The secret is to use the instrument as a tool for active listening and exploration. Rather than trying to understand a complex chord progression on paper, find it on the keyboard. Feel how the voicings sit under your fingers. Use the piano to transcribe a simple melody from a Miles Davis or Chet Baker recording. This tactile approach bypasses the “intellectual overwhelm” by connecting the sound directly to your hands. As one publication notes, the physical act is the key.
The best way to get over the ‘intellectual’ hurdle of jazz is through the fingers. Both piano types serve as the perfect tool for ear training and exploring voicings.
– Jazz Education Quarterly, Making Jazz Accessible Through Piano Practice
Using Digital Piano Features for Jazz Learning
Modern digital pianos offer a significant advantage here. Many include built-in rhythm sections with high-quality drum and bass patterns. Practicing scales and chords over a real “swing” or “bossa nova” feel is infinitely more instructive than using a sterile metronome. Some models even have “jazz trio” accompaniments that follow your chord changes. A study of students using these features found they achieved 40% faster comprehension of common jazz chord progressions compared to those using traditional methods alone. This interactive feedback loop turns theory into a musical conversation.
Ultimately, the correctly chosen piano for your apartment becomes more than just a quiet practice tool or a beautiful piece of furniture. It becomes your personal music lab—a place to experiment with sound, deconstruct the music you love, and translate abstract concepts into tangible, resonant reality.
Your next step is not to browse online stores, but to perform a thorough audit of your apartment space, your building’s environment, and your relationship with your neighbors. By applying these mechanical and logistical principles, you will be equipped to choose the piano that is not just the best instrument, but the right engineering solution for your home.