
In summary:
- Stop thinking about parameters and start thinking about musical intent and sonic sculpture.
- Master the core components—filter, envelope, and LFOs—to shape the character and life of your sound.
- Build your sound dry, without reverb or delay, to ensure its fundamental character is strong.
- Start with modern software synths; they offer visual feedback and unlimited experimentation without the cost and hassle of vintage gear.
- True expression comes from intentionally mapping your playing style (like velocity and the mod wheel) to key synth parameters.
If you’re a keyboardist, you know the feeling. You scroll through hundreds of presets—”Lush Pad,” “80s Lead,” “Aggro Bass”—but none of them quite capture the sound in your head. You might tweak a knob here or there, but you feel stuck, limited by someone else’s creative decisions. The common advice is to learn the function of every single knob, memorizing what oscillators, filters, and envelopes do. While technically correct, this approach often misses the most crucial element: musicality.
The journey from a preset user to a sound designer isn’t about becoming a technician. It’s about becoming a sculptor. The raw waveforms from your synth’s oscillators are your block of clay. The filters are your chisels, the envelopes your shaping tools, and modulation your fine-detail work. The real breakthrough happens when you stop asking “What does this knob do?” and start asking “What sound do I want to create, and which tool will get me there?”
This guide is built on that philosophy. We won’t just explain the parameters; we’ll connect them to expressive outcomes. You’ll learn not only how to build a patch but how to imbue it with character, life, and emotion, transforming your synthesizer from a simple sound module into a true extension of your musical voice.
For those who prefer a hands-on visual demonstration, the following video offers an excellent deep dive into the world of modulation, showing how different components work together to create dynamic and evolving sounds. It’s a perfect complement to the concepts we’re about to explore.
To guide you on this creative journey, we’ve structured this article to build your skills step-by-step. We’ll start with the most expressive tools, move on to practical examples, and then cover the strategic choices that separate amateur sounds from professional patches.
Table of Contents: A Journey from Basic Knobs to Signature Sounds
- Why Is the Filter Cutoff the Most Expressive Knob on Your Synth?
- How to Recreate That Famous 80s Bass Sound in 5 Steps?
- Mono or Poly: Which Mode Makes Your Lead Lines Punchier?
- The Reverb Trap: Why Drowning Your Synth Patch Hides Its Character?
- How to Use LFOs to Add Life to Static Pad Sounds?
- Why Buying Vintage Gear Is a Bad Idea for Your First Studio?
- Why Are 7th and 9th Chords Essential for the Lo-Fi Hip Hop Sound?
- How to Build a Sound System That Physically Moves the Crowd?
Why Is the Filter Cutoff the Most Expressive Knob on Your Synth?
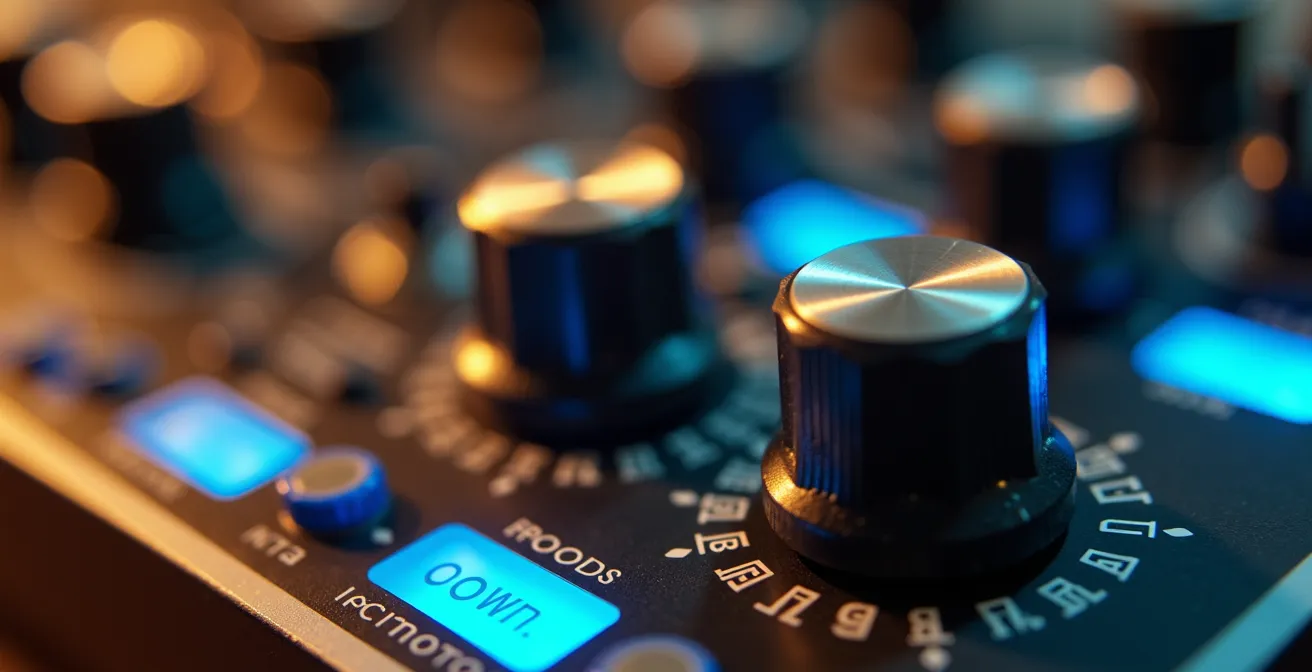
The filter is the heart of subtractive synthesis. While the oscillators create the raw harmonic content, the filter is what shapes it into something recognizable and musical. Think of it as controlling the “brightness” or “darkness” of a sound. A low cutoff frequency results in a muffled, bassy tone, while a high cutoff lets all the buzzy, bright harmonics through. This single control is your primary tool for sonic sculpture, allowing you to instantly change the entire mood of a patch.
But its true power lies in movement. A static filter setting is lifeless. The magic happens when you modulate the cutoff frequency. The most common way is with an envelope, creating a “pluck” or “swell” as a note is played. A fast attack and decay on the filter envelope give you percussive stabs, while a slow attack creates a sound that gently fades into existence. More importantly, assigning the filter cutoff to velocity or the mod wheel creates expressive mapping. This allows you to play the filter in real-time, making notes brighter the harder you play or manually “opening” the sound during a soaring solo. This dynamic control is the first and most important step in breaking free from static presets.
To get started on the right foot, it helps to have a methodical process. This checklist helps you move from a raw idea to a finished, expressive patch by focusing on the most critical parameters in a logical order.
Your Action Plan: Synth Patch Design Checklist
- Choose Your Base Waveform: Start with a saw wave for classic, harmonically rich sounds, or experiment with square or triangle waves for different timbres.
- Set the Filter Cutoff: Position the cutoff to shape the core brightness. Find the sweet spot where the sound has the right amount of edge without being harsh.
- Add Velocity Sensitivity: Route your keyboard’s velocity to both the filter cutoff and the volume. This is the key to a dynamically playable patch.
- Apply Subtle Modulation: Use a very slow LFO (Low-Frequency Oscillator) on the pitch and filter for a touch of organic movement.
- Fine-tune Resonance: Add just enough resonance to make the filter “sing” at the cutoff point, but avoid the piercing whistle that can overwhelm the sound.
- Map Performance Controls: Assign the mod wheel or an expression pedal to the filter cutoff for real-time, hands-on control during a performance.
How to Recreate That Famous 80s Bass Sound in 5 Steps?
One of the best ways to learn sound design is to recreate sounds you love. That iconic, thick 80s synth bass is a perfect starting point because it relies on a few simple but powerful techniques. The core of this sound isn’t one oscillator, but two. By using two sawtooth oscillators and slightly detuning one of them (by just a few cents), you create a slow, “beating” phase cancellation that gives the sound its signature fatness and movement. This subtle instability is a hallmark of vintage analog gear.
Next, shape it with the filter and amplifier. For that classic bass pluck, you’ll use an envelope (ADSR) on the filter. Set a fast attack, a medium decay (around 400-600ms), zero sustain, and a short release. This creates the “wow” or “pow” sound at the start of each note. Apply a similar “gate” envelope to the amplifier: fast attack, no decay, full sustain, and fast release. This gives you a tight, consistent note duration. You are not just setting parameters; you are defining the dynamic storytelling of the sound—a sharp attack followed by a quick timbral shift.
The difference between the original analog hardware and modern software is a common topic, but the principles remain the same. Detuning oscillators and shaping with envelopes are universal concepts. The key is to understand the “analog approach” to achieve that classic warmth, even with digital tools.
This following table breaks down the differences in approach, which can help you emulate vintage character using modern software synths. As you can see in the comparison between analog and digital workflows, modern tools often require you to intentionally add the imperfections that made vintage gear so musical.
| Parameter | Analog Approach | Digital/Software Approach |
|---|---|---|
| Oscillator Detuning | Manual fine-tuning by ear, creates natural drift | Precise cent values, stable but needs randomization |
| Filter Response | Non-linear, musical distortion at high resonance | Clean, predictable, may need saturation plugin |
| Envelope Behavior | Instant response, slight curve variations | Sample-accurate, perfectly repeatable |
| Modulation | Limited routing, forces creative solutions | Unlimited routing possibilities, risk of over-modulation |
Mono or Poly: Which Mode Makes Your Lead Lines Punchier?
The choice between monophonic (one note at a time) and polyphonic (multiple notes at a time) modes seems simple, but it has a profound impact on the musical function of your patch. For chords and pads, polyphony is essential. But for lead lines, basslines, and arpeggios that need to cut through a mix, monophonic mode is your secret weapon. It focuses all of the synthesizer’s power into a single, authoritative voice.
When you switch a synth to mono mode, you unlock a new set of expressive performance tools. One of the most important is legato. When legato is enabled, the envelopes don’t re-trigger for every new note if you play them in a connected (legato) style. This creates smooth, flowing lines without the aggressive “attack” on each note. Conversely, for a more aggressive, punchy feel, you can ensure your synth is set to “multi-trigger,” where every single key press fires the envelopes anew. This gives each note a distinct, percussive impact.
Furthermore, mono mode often enables features like portamento or “glide,” which smoothly slides the pitch from one note to the next. A short portamento time (10-30ms) can make a lead line sound more organic and vocal-like. Combining mono mode with a “unison” feature, which stacks multiple voices onto a single note and detunes them slightly, is the ultimate recipe for powerful, mix-crushing leads. You get the thickness of multiple oscillators with the focused discipline of a single melodic line.
The Reverb Trap: Why Drowning Your Synth Patch Hides Its Character?
When a synth patch sounds thin or boring, the most common reflex is to drench it in reverb and delay. While these effects can add a beautiful sense of space, they are often a crutch that masks a weak sound. This is the “Reverb Trap.” A truly great patch has a strong core character that stands on its own before any effects are applied. If you do the heavy lifting in the synthesis stage, your sounds will sit better in a mix and have more impact.
Think of reverb as the room you place your sound in, not the sound itself. Before you reach for that reverb knob, ask yourself: is the raw sound interesting? Is the filter movement engaging? Does the patch respond to my playing dynamics? If the answer is no, reverb will only turn a boring dry sound into a boring wet sound. Focus on refining the oscillators, envelopes, and modulation first. Use unison, subtle detuning, or chorus to add thickness. Use filter envelopes to create timbral movement. Once you have a patch that is compelling on its own, a small amount of reverb will enhance it rather than hide it.
There are many ways to create a sense of space and depth without resorting to a massive reverb tail that washes out your mix. Short delays, careful stereo panning, and subtle chorus can all add dimension while preserving clarity. This preserves the sonic space for other instruments.
- Use a chorus effect with a low mix percentage (15-25%) to create stereo width without mushiness.
- Apply a short slapback delay (20-50ms with one or two repeats) to create a sense of depth and ambience.
- Implement the Haas effect by duplicating a track, panning one hard left and the other hard right, and delaying one by 10-30ms.
- Use a high-pass filter on your reverb return channel to remove low-frequency mud and keep the core of your mix clean.
How to Use LFOs to Add Life to Static Pad Sounds?
A static pad sound, no matter how harmonically rich, can quickly become monotonous. The key to creating evolving, organic pads is modulation, and the primary tool for this is the Low-Frequency Oscillator (LFO). An LFO generates a continuous, repeating waveform (like a sine or triangle wave) at a very slow, sub-audio rate. By assigning this LFO to control another parameter, you can create constant, subtle movement that brings a patch to life.
The most common and effective use is to assign an LFO to the filter cutoff. Setting a slow LFO (around 0.1 to 0.3 Hz) to gently modulate the filter creates a sound that slowly brightens and darkens over time. The key is subtlety; you want a gentle pulse, not a jarring “wobble.” Another powerful technique is to apply an LFO to the pitch of the oscillators. A tiny amount of pitch modulation (modulating by only a few cents) emulates the natural pitch drift of vintage analog synthesizers, adding a rich, warm instability that feels organic and alive. This continuous, slow change is the essence of dynamic storytelling in sound design.
As experts from Future Music Magazine point out, this movement doesn’t need to be obvious to be effective. The goal is often to create a near-imperceptible evolution that keeps the listener engaged.
LFO modulation is one of the easiest ways to inject movement into a static synth patch. This doesn’t have to manifest as overt wobbling, either – often, an extremely subtle amount of modulation can dial in that near-imperceptible effect you need.
– Future Music Magazine, MusicRadar
For truly evolving textures, use multiple LFOs running at different, unsynchronized rates. For example, have one LFO slowly modulating the filter, a second, slightly faster LFO modulating the pitch, and a third modulating the stereo pan position. Because the LFOs are not in sync, the pattern of modulation will never repeat exactly, creating a pad that feels constantly changing and new.
Why Buying Vintage Gear Is a Bad Idea for Your First Studio?
There’s a powerful mystique around vintage synthesizers. We see them in photos of our favorite artists, and we hear stories of their “unmatched analog warmth.” While these instruments are beautiful pieces of history, they are often a terrible choice for someone just learning sound design. The biggest reason is the complete lack of modern conveniences. Most vintage synths have no way to save your work. Once you turn a knob, the previous sound is gone forever, making iterative learning and comparison impossible.
Modern software synthesizers, on the other hand, are built for learning. They provide real-time visual feedback, showing you the shape of your waveform, the curve of your envelopes, and the movement of your LFOs. This direct cause-and-effect visualization drastically accelerates the learning process. You can see exactly how turning the “cutoff” knob is affecting the sound’s harmonics. Furthermore, with software, you can save unlimited versions of a patch, compare A/B variations with a single click, and undo mistakes without consequence. This creates a low-risk environment perfect for experimentation.
Beyond the workflow, there’s the practical reality of maintenance and cost. Vintage gear is often unreliable, requiring time and money for tuning and repairs. For a beginner, this is time not spent on the actual goal: learning to sculpt sound. The idea that you need expensive hardware to get a “professional” sound is a myth.
This table highlights the stark differences a beginner faces when choosing between vintage hardware and modern software. The advantages of software for learning are overwhelming.
| Aspect | Vintage Hardware | Modern Software | Impact on Learning |
|---|---|---|---|
| Patch Recall | No save/recall – settings lost when changed | Unlimited save/compare/undo | Software allows iterative learning |
| Visual Feedback | No waveform display or modulation visualization | Real-time visual feedback of all parameters | Faster understanding of cause-effect |
| Maintenance Time | 30-40% time on tuning/troubleshooting | 0% – always ready to use | More time for actual sound design |
| Learning Resources | Limited documentation, model-specific | Extensive tutorials, universal concepts | Easier skill transfer between synths |
| Cost of Mistakes | $500-5000 per wrong purchase | $0-200 for full-featured options | Low-risk experimentation |
Why Are 7th and 9th Chords Essential for the Lo-Fi Hip Hop Sound?
Lo-fi hip hop is defined by its mood—nostalgic, relaxed, and slightly melancholic. This emotion comes as much from the harmony as it does from the production. The genre heavily leans on the rich, complex sounds of 7th and 9th chords borrowed from jazz and soul music. Unlike basic major and minor triads, these chords contain more notes and create a denser, more sophisticated harmonic texture. A major 7th chord (like C-E-G-B) has a dreamy, gentle quality, while a dominant 7th can add a bluesy tension. These chords are the harmonic foundation of the lo-fi aesthetic.
However, simply playing these chords isn’t enough. The sound design is what transforms them into the classic lo-fi vibe. The goal is to emulate the imperfections of old recording mediums like vinyl records and cassette tapes. This means filtering out the harsh high-end. Apply a low-pass filter to your synth patch, cutting off frequencies above 2-4kHz to get that “underwater” or “warm” feeling. Adding a slow, subtle pitch wobble via an LFO mimics the ‘wow and flutter’ of an unstable tape machine, further enhancing the nostalgic character.
The concept of “warmth” in sound design is deeply connected to this filtering and subtle instability. A sound feels warm when it’s harmonically rich but dark on top, without the piercing brightness of pure digital sounds.
We tend to say a sound is warm when it’s harmonically rich and dark. However, it could also describe the sort of hug your ears get from a big analog polyphonic synth, or even a mono patch with some creative unison settings.
– Soundfly, Advanced Synths and Patch Design for Producers
Finally, processing the chords is key. A touch of bit-crushing or tape saturation adds grit, while sidechain compression ducking the synth to the kick drum creates the genre’s signature rhythmic pulse. It’s the combination of sophisticated harmony and degraded, “imperfect” sound design that defines the lo-fi sound.
Key takeaways
- Sound design is an act of sonic sculpture; your goal is to shape raw waveforms to match your musical intent.
- The core character of a sound comes from its synthesis—oscillators, filters, and envelopes. Use effects to enhance, not to hide a weak sound.
- The most expressive patches are those that respond to your playing. Map velocity and the mod wheel to key parameters like filter cutoff and volume.
How to Build a Sound System That Physically Moves the Crowd?
Creating a synth patch that sounds good on headphones is one thing. Creating one that has a physical, chest-thumping impact on a large sound system is another challenge entirely. The key lies in understanding and controlling the low-frequency spectrum. The visceral feeling of “moving the crowd” comes from the sub-bass, and this requires a disciplined, layered approach. A common mistake is to try and get all your bass from a single sound, which often results in a muddy, indistinct mess on a big system.
The professional approach is to build your bass in layers. The first layer is the pure sub-bass, typically a simple sine wave in the 40-60Hz range. This frequency range isn’t so much “heard” as it is “felt.” This layer provides the physical weight and foundation. The second layer, from roughly 80-150Hz, is the “punch” layer. This is where the character of your bassline lives—the part you can hear on smaller speakers and that defines the note. This could be a saw or square wave, filtered to focus on that frequency band.
Crucially, everything below about 120Hz should be kept strictly in mono. Stereo information in the low end can cause phase cancellation issues on club systems, which can make your bass completely disappear in parts of the room. High-pass filter every other instrument in your track (including kicks, synths, and vocals) to create a dedicated space for your bass and sub-bass to dominate. Use a spectrum analyzer to visually confirm that there are no other instruments competing for energy in that critical low-end zone. This isn’t about making one sound louder; it’s about carving out a specific frequency space for each element to do its job effectively.
The journey from browsing presets to sculpting your own sounds is one of the most rewarding in modern music production. The best way to learn is by doing. Open your favorite synthesizer right now, start with a simple saw wave, and begin to shape it. Don’t be afraid to make mistakes—every knob twist is a learning experience. Start sculpting.