Forget everything you’ve heard about soundproof foam—the real secret to drumming in an apartment is killing vibration at the source.
- Low-frequency sounds and structural vibrations from your kick drum are the main culprits that travel through floors and walls, which foam panels do nothing to stop.
- Effective solutions focus on decoupling your kit from the building’s structure, primarily through DIY solutions like a tennis ball riser.
Recommendation: Prioritize building a vibration isolation platform for your kit before spending a single dollar on acoustic foam.
The dreaded knock on the door. Every drummer in an apartment lives in fear of it. It’s that moment when your neighbor’s patience finally runs out, and your passion for rhythm clashes with the reality of shared living spaces. You’ve probably heard the standard advice: get an electronic kit, cover your walls in cheap foam, or just try to play softly. But if you’re here, you know those “solutions” are either incomplete or flat-out wrong. The thud of your kick pedal still travels, the feel of rubber pads is uninspiring, and those foam panels do surprisingly little to contain the powerful, low-frequency energy of a drum kit.
The fundamental misunderstanding is that we’re fighting a battle of volume. We’re not. We are fighting a battle against structural vibration. The real enemy isn’t the crash of a cymbal your neighbor hears through the air; it’s the kick drum pulse they feel through their floorboards, transmitted directly through the building’s frame. This is a war of physics, not just acoustics. True apartment drumming isn’t about being silent; it’s about being smart.
This guide cuts through the noise and misinformation. We’ll dismantle the myths that waste your money and focus on the street-smart, battle-tested strategies that actually work. We will explore how to decouple your kit from the floor, reclaim your dynamic touch on an electronic set, and understand the crucial difference between treating your room’s sound and actually soundproofing it. By the end, you’ll have a clear, actionable plan to practice your craft without risking an eviction notice.
This article provides a comprehensive roadmap for the urban drummer. Below is a summary of the key strategies we will cover to keep you playing and your neighbors happy.
Summary: Your Guide to Neighbor-Friendly Drumming
- Why Do Soundproofing Foam Panels Fail to Stop Drum Noise?
- How to Build a Tennis Ball Riser to Kill Kick Drum Vibrations?
- Mesh Heads or Rubber Pads: Which Feel Closer to Real Drums?
- The “Electronic Touch” Mistake That Ruins Your Acoustic Dynamic Control
- When Is the Safest Time to Practice Drums in a Shared Building?
- The Acoustic Treatment Mistake That Ruins Expensive Microphone Quality
- Why Is Tapping Your Foot Insufficient for Complex Polyrhythms?
- How to Lock in the “One Drop” Rhythm for Authentic Reggae Feel?
Why Do Soundproofing Foam Panels Fail to Stop Drum Noise?
It’s the first thing every aspiring apartment drummer tries: covering the walls with those charcoal-colored foam panels. It feels productive, but it’s one of the biggest myths in home acoustics. These panels are designed for acoustic treatment, not soundproofing. Their job is to absorb high and mid-range frequencies *inside* a room, reducing echo and reverb to make recordings sound cleaner. They do absolutely nothing to stop the powerful, low-frequency sound waves generated by a kick drum or floor tom from blasting right through your walls.
The real issue is twofold: airborne low frequencies and, more importantly, structural transmission. Low-frequency sound waves are long and powerful; they require immense mass and density to block, something a lightweight foam panel simply doesn’t have. The “thud” from your kick pedal isn’t just traveling through the air; it’s being directly transferred into the floor, turning the entire building’s structure into a giant speaker. This is why your downstairs neighbor feels like you’re drumming on their ceiling—because, structurally, you are.
The Reality of True Soundproofing
To put it in perspective, professional recording studios achieve true soundproofing by building a “room-within-a-room.” This involves constructing a completely separate, decoupled internal structure that floats on isolation materials. According to one analysis, even a pre-fabricated isolation booth solution like a Whisper Room costs around $8,000 and requires structural changes that are impossible for most renters. This illustrates that stopping drum noise requires serious construction, not just sticking foam to a wall.
So, while foam might slightly deaden the “smack” of your snare for your own ears, it offers a false sense of security. Your neighbors will still hear and feel the most annoying parts of your practice session. The first step to solving the problem is accepting that the answer isn’t on your walls; it’s on your floor.
How to Build a Tennis Ball Riser to Kill Kick Drum Vibrations?
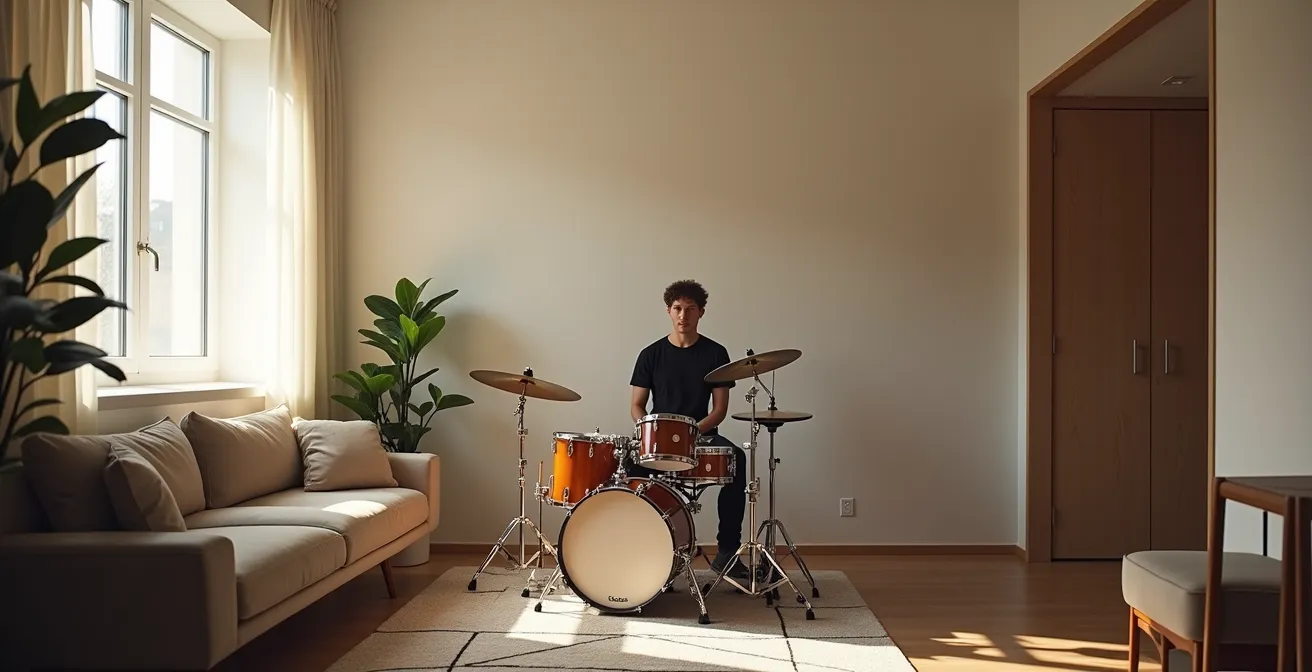
Now that we’ve established that structural transmission is the real enemy, the solution becomes clear: you need to decouple your drum kit from the floor. You need to create a floating platform that absorbs the vibrations from your kick pedal and throne before they can ever reach the building’s frame. This is where the legendary DIY “tennis ball riser” comes in. It’s a cheap, incredibly effective, and street-smart solution that has saved countless drummers from noise complaints.
The concept is simple: you create a sandwich of two layers of sturdy plywood or MDF, with tennis balls placed in between. The drum kit sits on top of this platform. When you stomp the kick pedal, the energy travels into the platform, where the compressed air inside the tennis balls acts as a shock absorber, dissipating the vibration as a tiny amount of heat instead of transferring it to the floor. It’s the most impactful and cost-effective soundproofing measure you can take.

To build one, you’ll need two sheets of 3/4″ MDF or plywood cut to the footprint of your kit, a drill with a hole-saw bit (around 2.5 inches), and a few dozen tennis balls. You simply drill a grid of holes halfway through one of the boards to create cups for the balls, lay the balls in, and place the second board on top. While tennis balls are the classic budget choice, other materials can also be effective, depending on your budget and needs.
This simple DIY project directly tackles the primary source of noise complaints. The following table provides a comparison of materials you can use for your vibration isolation platform.
| Material | Cost | Effectiveness | Installation Difficulty |
|---|---|---|---|
| Tennis Balls | $20-30 | Good for budget | Easy DIY |
| Rubber Mat (1 inch) | $50-100 | Better dampening | Simple placement |
| Sorbothane Pucks | $100-200 | Professional level | Moderate |
| Specialized Isolation Feet | $200+ | Best for heavy kits | Professional install |
Mesh Heads or Rubber Pads: Which Feel Closer to Real Drums?
Once you’ve solved the vibration issue with a riser, the next line of defense is an electronic drum kit. But not all e-kits are created equal, and the biggest dividing line for an apartment drummer is the playing surface: mesh heads versus solid rubber pads. While older and cheaper kits often use rubber pads, they are significantly louder. The dense rubber creates a loud, percussive “thwack” on impact that can still be audible through walls, and the impact vibration can still travel if your kit isn’t properly isolated.
Modern mesh heads, pioneered by Roland and now common on kits from brands like Alesis, are the clear winner for apartment life. They consist of a woven material stretched over the drum shell, providing a playing experience that is far closer to a real acoustic drum. More importantly, they are dramatically quieter. Studies show that modern mesh heads achieve approximately 80% volume reduction compared to acoustic drums, and a significant reduction over rubber pads. The stick impact is a soft “tap,” and most of the sound is generated electronically, heard only through your headphones.
The Evolution from Loud Rubber to Quiet Mesh
Many drummers’ experiences confirm this technological leap. One player recounted using an older Yamaha DTXpress IV with rubber pads and still receiving complaints from neighbors who could hear the tapping through thin apartment walls. After switching to a modern mesh head kit, like the Alesis Surge Mesh, the problem disappeared. This highlights that for serious, neighbor-conscious practice, investing in a kit with mesh heads is not a luxury, but a necessity.
The difference in feel is also significant. Mesh heads offer adjustable tension and a rebound that can be tailored to feel more like a real drum, aiding in technique development. Rubber pads, by contrast, offer a harder, less forgiving rebound that can feel unnatural and lead to fatigue. For both noise and playability, the choice is clear: mesh is the only way to go for the serious apartment drummer.
The “Electronic Touch” Mistake That Ruins Your Acoustic Dynamic Control
You’ve built the riser and bought a great mesh-head kit. You’re practicing silently, and the neighbors are happy. But a new, insidious problem is creeping in: the “electronic touch.” Electronic drums, with their forgiving triggers and volume knobs, can make you a lazy drummer. You start hitting every pad with the same velocity because the module will just output a perfect, loud sound every time. You lose the nuance of ghost notes, the subtle dynamics of a crescendo, and the fine muscle control required to play expressively on an acoustic kit.
This dynamic compromise is a trap. When you eventually sit down at a real acoustic kit, your doubles sound sloppy, your backbeats are one-dimensional, and your touch is gone. You’ve been training your limbs to rely on a volume knob, not on their own control. To avoid this, you must consciously fight back and use your electronic kit as a tool to *refine* your dynamics, not just to practice patterns silently.
This means turning the module’s volume up and forcing yourself to play softly. It means focusing on the consistency between your right and left hands, ensuring your ghost notes are barely audible, and your accents pop. Treat your practice sessions as dynamic workouts, not just rhythmic exercises. Recording yourself is a brutally honest way to diagnose if you’ve fallen into this trap.
Your Action Plan: Dynamic Control Recovery Exercises
- Record yourself playing: Listen back specifically for inconsistent doubles or a lack of power in your backbeats.
- Practice at lower volumes: Deliberately work on your kick drum dynamics and overall lighter touch without the module compensating for you.
- Diagnose and prescribe: Focus on fixing one weakness at a time, whether it’s weak ghost notes or uneven fills.
- Strengthen your light touch: Actively practice playing softly, forcing your muscles to develop control instead of relying on the kit’s volume settings.
When Is the Safest Time to Practice Drums in a Shared Building?
Even with the best soundproofing and the quietest kit, there’s a human element to drumming in an apartment: courtesy. A key part of avoiding conflict is being smart about *when* you practice. Running a loud vacuum cleaner at 3 AM is inconsiderate, and so is practicing your blast beats when your neighbor is trying to put their baby to sleep. The “Golden Rule” of shared spaces applies doubly to drummers.
There’s a generally accepted window of “reasonable noise” in most residential buildings. From extensive community discussions, many drummers report the most neighbor-friendly practice hours are between 10am and 6pm on weekdays. This is when most people are out of the house at work, or general daytime noise makes a little extra sound less noticeable. Practicing late at night (after 9 PM) or early in the morning (before 9 AM) is asking for trouble, regardless of how quiet you think you are.
Beyond simply choosing the right hours, proactive communication is your greatest tool. Don’t wait for an angry knock. Go talk to your immediate neighbors (next door, and especially downstairs). Introduce yourself, explain that you’re a passionate musician, and show them the steps you’ve taken to mitigate noise. Here’s a simple protocol:
- Build Understanding: Talk to them about your passion. Frame it as a serious hobby or profession, not just banging on things.
- Establish a Schedule: Work with them to find the best times. Ask, “When are you usually not home?” This shows respect for their schedule.
- Give Them Your Number: Tell them, “If it’s ever too loud, please text me first before you get upset or call the landlord.” This gives you a chance to fix the problem immediately.
- Build Empathy: You could even offer them a chance to try the drums themselves. It can demystify the noise and build a personal connection.
A little bit of human decency and proactive communication can be more effective than thousands of dollars in soundproofing.
The Acoustic Treatment Mistake That Ruins Expensive Microphone Quality
Let’s say you’ve followed all the advice: you have an isolated e-kit, happy neighbors, and you’re ready to start recording. You set up a couple of expensive microphones to capture your acoustic cymbals or even your whole kit, only to find the recordings sound boxy, harsh, and unprofessional. The mistake is thinking that a quiet room is the same as a good-sounding room. This is where acoustic treatment—the thing foam panels are actually for—finally becomes relevant.
Small, square rooms like most apartment bedrooms are an acoustic nightmare. Sound waves bounce back and forth between parallel walls, creating a phenomenon called “flutter echo” and “standing waves.” This creates a messy wash of reflections that your microphone picks up, muddying your drum sound. You might have a perfectly tuned snare, but the recording sounds like you’re playing in a tiled bathroom. This is the mistake that ruins microphone quality: ignoring the acoustic environment of the room itself.
The Quest for a Balanced Recording Environment
One drummer’s journey to a quiet-yet-recordable setup in an apartment highlights this balance. It took years of testing different gear combinations to find tools that allowed for hard grooving at a fraction of the volume. By carefully combining a quiet kit with targeted acoustic treatment, they ultimately achieved zero neighbor complaints over 2.5 years while maintaining a high-quality recording environment. This proves that both isolation and treatment are necessary for recording.
Strategically placing acoustic panels (yes, this is where they belong!) on the walls at the first reflection points can tame these echoes. Adding bass traps in the corners can help control the low-frequency buildup that makes small rooms sound “boomy.” The goal isn’t to make the room dead silent but to create a balanced acoustic space where your microphones capture the direct sound of your drums, not a chaotic mess of reflections.
For drummers looking to record, managing sound leakage and internal room acoustics is key. This table outlines common solutions for improving a room for recording purposes.
| Treatment Type | Effect on Recording | Cost | Installation |
|---|---|---|---|
| Weather Stripping (Doors) | Reduces leakage | $20-50 | DIY Easy |
| Acoustic Sealant | Seals gaps | $30-100 | DIY Moderate |
| ClearSonic Panels | Deflects sound | $500-1500 | No installation |
| Full Isolation Booth | Professional isolation | $8000+ | Professional required |
Why Is Tapping Your Foot Insufficient for Complex Polyrhythms?
A huge part of drumming happens away from the kit. We’re constantly working on our internal clock, tapping out rhythms on steering wheels, desks, and our own legs. A common way to practice coordination is by tapping a basic pulse with your foot while tapping a more complex rhythm with your hands. This is great for simple time signatures, but when you start exploring complex polyrhythms (like 3 against 4, or 5 against 2), simply tapping your foot falls short.
The problem is that a simple, repetitive foot tap doesn’t force your brain to truly internalize the relationship between the two competing rhythms. Your foot becomes an unconscious metronome, but your brain isn’t actively calculating the subdivisions and points of intersection. To master polyrhythms, you need to feel both sides of the equation equally within your body. Your foot isn’t just a timekeeper; it’s a limb that needs to be as rhythmically independent as your hands.
Truly silent and effective polyrhythm practice involves methods that force full-body coordination and mental subdivision, without making a sound. These methods build deep internal timing that a simple foot tap can’t replicate:
- Vocalization: Use your voice to “sing” one rhythm while clapping or tapping the other. This engages a different part of your brain.
- Mental Subdivision: Close your eyes and visualize the pulse. “Step” through the subdivisions in your mind without any physical movement.
- Hand-to-Hand Practice: Practice the polyrhythm entirely on a practice pad or your knees, assigning one rhythm to your right hand and the other to your left. This builds the foundational coordination.
- Silent Counting: Work through the rhythm using only internal counting systems (e.g., “1-e-and-a, 2-e-and-a…”), focusing on where the different beats land within that count.
These techniques move beyond mindless tapping and build a true cognitive and physical understanding of complex rhythmic relationships, which is the foundation of advanced drumming.
Key Takeaways
- The “One Drop” rhythm is defined by the space and the feel, making it perfect for quiet practice that emphasizes control over volume.
- Specialized low-volume gear, like quiet cymbals and mesh heads, allows you to practice the physical motions of reggae without the acoustic power.
- Using brushes instead of sticks is a classic technique to drastically reduce volume while still working on the essential hi-hat and snare patterns.
How to Lock in the “One Drop” Rhythm for Authentic Reggae Feel?
Reggae drumming is all about feel, groove, and most importantly, the space *between* the notes. The classic “One Drop” rhythm, with its signature emphasis on the third beat, is a perfect style to practice in an apartment because its authenticity comes from control and timing, not raw power. You can work on your reggae feel almost silently, and the techniques involved are perfectly suited for a low-volume setup.
The key to the One Drop is the relationship between the cross-stick snare on beat 3 and the driving hi-hat pattern. You don’t need to hit hard to practice this. In fact, playing it softly forces you to focus on what truly matters: the relaxed, behind-the-beat placement of the snare and the steady pulse of the hi-hats. One of the best ways to practice this is with brushes. Using brushes instead of sticks naturally lowers the volume and encourages a lighter touch, which is essential for many reggae styles. It’s been shown that using brushes and specialized quiet equipment reduces drum volume to one-fifth of regular volume, making it an ideal choice.
A quiet practice routine for reggae can be incredibly effective. By combining the right gear with the right mindset, you can spend hours locking in your groove without disturbing anyone. Focus on these elements:
- Use Brushes: Swap your sticks for brushes to get an authentic feel while drastically cutting volume.
- Low-Volume Cymbals: Practice intricate hi-hat patterns using specialized quiet cymbals, like the Zildjian L80 series, which are designed for this exact purpose.
- Focus on Space: Use a practice pad to work on the timing and the “space” in the rhythm, making sure your backbeat is lazy and powerful.
- Mesh Heads for Feel: Mesh heads on your e-kit will allow you to practice the cross-stick backbeat with a realistic feel at a minimal volume.
By focusing on these quiet techniques, you can develop a deep, authentic reggae feel that will translate perfectly when you finally sit down at an acoustic kit.
The journey of an apartment drummer is one of resourcefulness, respect, and a deep understanding of physics. It’s about outsmarting the building, not overpowering your neighbors. By shifting your focus from “soundproofing” to “vibration decoupling” and from mindless repetition to dynamic control, you transform a logistical nightmare into a solvable problem. You prove that with the right knowledge and a bit of DIY spirit, a passion for drumming can thrive anywhere. Now that you have the strategies, the next step is to start implementing them. Evaluate your current setup, identify the biggest source of noise, and start with the solution that will have the most impact. Begin building your riser, have that conversation with your neighbor, or start those dynamic control exercises today. Your drumming future depends on it.