Contrary to common advice, priming a canvas is not about applying gesso; it’s a precise chemical process to shield fabric fibers from the corrosive acid in your oil paint.
- Sizing with PVA is the non-negotiable first step to create an impermeable barrier against oil degradation.
- The choice between quick-drying acrylic gesso and slow-curing oil primer dictates the painting’s final luminosity and structural integrity.
Recommendation: Test your primed surface’s absorbency with a single drop of linseed oil before you ever lay down a brushstroke.
For the aspiring painter, there is no greater heartbreak than to see a finished work begin to self-destruct. A network of fine cracks appears, the colours grow dull and seem to sink into the weave, and the once-vibrant surface becomes brittle. The common advice is often simplistic: apply a few coats of gesso, sand it smooth, and begin. This approach treats the preparation of a canvas as a mere chore, a prelude to the real work of painting. It is a profound and costly misunderstanding.
The truth, known to master craftsmen for centuries, is that preparing a canvas is an act of chemical engineering. It is the foundational science upon which the entire artwork rests. The primary enemy is the oil itself. Linseed oil, the vehicle for your pigments, contains linoleic acid, which will slowly but surely break down the cellulose fibers of a cotton or linen canvas, causing it to become brittle and decay. Priming is not about creating a white surface; it is about creating an archival-grade barrier to prevent this inevitable chemical rot.
This guide departs from superficial tips. We will not merely tell you *what* to do; we will explain the material science of *why* you are doing it. We will explore the properties of different fibers, the critical role of sizing, the chemical differences in primers, and the physical forces that threaten your work. By understanding these principles, you will transition from someone who simply paints to a craftsman who builds paintings to last for generations.
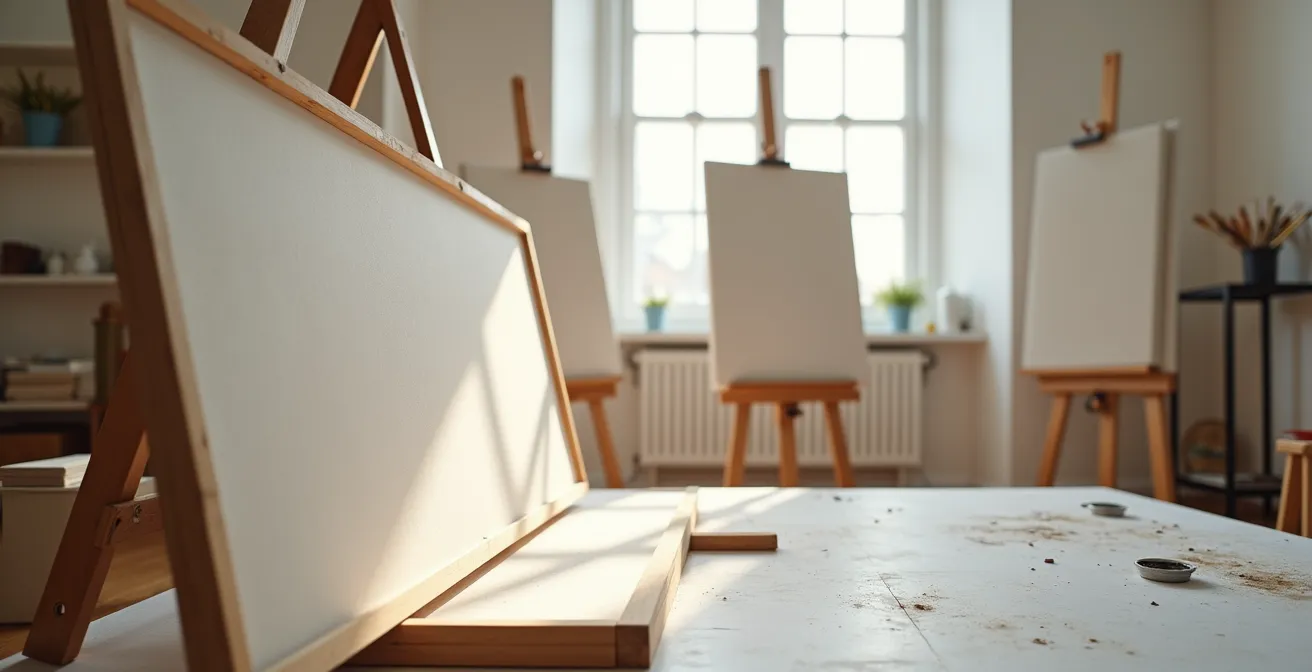
This article provides a comprehensive exploration of the principles and techniques required to prepare a canvas for archival permanence. The following sections detail each critical step, from fiber selection to the final primed surface.
Summary: The Archival Approach to Canvas Preparation
- Why Does Linen Canvas Last 100 Years Longer Than Cotton Duck?
- How to Stretch Your Own Canvas to Get Drum-Tight Tension?
- Fast or Slow: Which Drying Time Fits Your Layering Style?
- The “Cracking” Mistake: Why Painting Thin Layers Over Thick Ones Ruins the Work?
- When to Wash Your Brushes to Prevent Acrylic Build-Up in the Ferrule?
- How to Build a Tennis Ball Riser to Kill Kick Drum Vibrations?
- Why Does Brick Absorb Paint Differently Than Concrete?
- How to Prevent Your Watercolor Paper From Buckling When Wet?
Why Does Linen Canvas Last 100 Years Longer Than Cotton Duck?
The choice of fabric is the first decision in a painting’s long life, and it is a critical one. While cotton duck is an affordable and popular choice, linen is the undisputed superior support for archival oil painting. The reason lies in the fundamental material science of the fibers. Linen is derived from the flax plant, whose fibers are significantly longer and stronger than the short, fluffy fibers of the cotton plant. This greater tensile strength means linen can withstand the constant tension and environmental changes over centuries with far less risk of tearing or distortion.
Furthermore, flax fibers contain natural waxes and oils that contribute to their flexibility and resistance to brittleness over time. Cotton, by contrast, is highly absorbent and its fibers are more susceptible to the acidic degradation from linseed oil. This chemical vulnerability is the primary reason cotton canvases from past centuries are in far worse condition than their linen counterparts. The structural integrity of linen is simply on another level.
Conservation studies of historical paintings consistently reveal linen’s superior longevity. For example, analysis of 150-year-old primed canvases shows that the tightly woven linen’s response to moisture is a key factor in how cracks form and propagate. A well-prepared linen support provides a stable, robust foundation that enhances the permanence of the entire artwork, making it the non-negotiable choice for any serious painter aiming for archival quality.
How to Stretch Your Own Canvas to Get Drum-Tight Tension?
A properly prepared ground is useless on a slack support. The tension of the canvas is not an aesthetic preference; it is a structural necessity. A canvas must be stretched to a drum-tight tension to resist the physical forces of painting and the environmental shifts it will endure over its lifetime. Stretching a canvas yourself is a fundamental skill of the painter-craftsman, granting you complete control over this critical variable. The process must be done *before* any sizing or priming is applied. Attempting to stretch a primed canvas will inevitably crack the rigid ground layer, creating invisible fissures that will haunt the final painting.
The tools are simple: four wooden stretcher bars with tongue-and-groove joints, a staple gun, and canvas pliers. For archival work, use coated staples made of copper or brass to prevent rust from bleeding into the canvas over decades. The technique requires a methodical approach. Begin by stapling the canvas to the middle of one stretcher bar. Move to the opposite bar, pull the canvas taut with pliers, and place another staple in the center. Repeat this for the remaining two sides, forming a cross pattern. From this central anchor point, work your way outwards towards the corners, alternating sides constantly to distribute the tension evenly. Each pull of the pliers should be firm and consistent, aiming for a surface that resounds like a small drum when tapped.

This process of creating uniform mechanical stress across the weave is what prevents future sagging and ripples. The corners should be folded neatly, like a well-made bed, ensuring no bulky lumps form. This hands-on process connects you intimately with your materials and establishes the physical integrity of the support from the very beginning.
Fast or Slow: Which Drying Time Fits Your Layering Style?
Once the canvas is sized, the primer, or “ground,” is applied. This layer serves two functions: it provides a surface with the right absorbency and “tooth” for the paint to adhere to, and it imparts a specific color and luminosity to the work. The choice of primer is a commitment to a certain working method, largely dictated by its drying chemistry. The three primary options are acrylic gesso, traditional oil primer, and modern alkyd-based primers.
Acrylic gesso is the most common choice for beginners. It dries quickly by water evaporation, typically allowing an artist to begin painting within 24 hours. However, it is highly absorbent and creates a purely mechanical bond with the oil paint, meaning the paint grabs onto its rough texture. For oil paintings, this requires several coats (often two to four) to reduce absorbency and prevent a dull, “sunk-in” look. Its speed is its main advantage.
Traditional oil primers, by contrast, dry slowly through oxidation, taking anywhere from two days to a week to fully cure. This slow process creates a less absorbent, smoother surface that forms a chemical bond with the subsequent layers of oil paint. This integration results in a more luminous and durable paint film. It is the choice for classical techniques that rely on transparent glazes and subtle light effects. The table below, based on guidelines from industry experts like Winsor & Newton, compares these options.
| Primer Type | Drying Time | Surface Quality | Best For |
|---|---|---|---|
| Acrylic Gesso | Minimum 24 hours before painting | More texture or tooth for paint to adhere to | Fast layering, modern techniques |
| Oil Primer | 2-7 days for full curing depending on brand | Smoother surface | Traditional techniques, luminous effects |
| Alkyd-Based | 12-24 hours | Moderate tooth, flexible | Hybrid approach, faster oil techniques |
Alkyd-based primers offer a compromise, providing a tougher film than acrylic gesso but drying much faster than traditional oil grounds. The choice is therefore a strategic one: do you prioritize speed or the luminous, integrated surface that only a slow-curing oil ground can provide?
The “Cracking” Mistake: Why Painting Thin Layers Over Thick Ones Ruins the Work?
The phenomenon of a painting cracking is often attributed to the “fat over lean” rule, which is a principle of paint application. However, a significant amount of cracking, known as support-induced cracking, originates from a poorly prepared ground long before the first layer of colour is applied. This is the direct result of the canvas and ground layers drying and aging at different rates, creating immense physical stress. Preventing this begins with the foundational step of sizing.
Sizing is the application of a sealant directly to the raw canvas fibers. Its sole purpose is to create an impermeable barrier that prevents the oil from the primer and the paint from soaking into the canvas. Traditionally, rabbit skin glue (RSG) was used, but it is highly hygroscopic (it absorbs atmospheric moisture), causing it to swell and shrink, which stresses the paint film. Modern, archival practice dictates the use of a PVA (polyvinyl acetate) size, which is pH neutral and creates a stable, flexible barrier impervious to moisture and oil.
After sizing, the primer is built up in gradual layers. Each layer must be allowed to dry properly before the next is applied. Rushing this process traps solvents or water, creating a weak and unstable ground. As accelerated aging studies on canvases show, the interaction between the sizing, ground, and fabric under environmental stress is the primary determinant of cracking. Applying the ground correctly is your first and best defense against it.
Your Action Plan: Auditing the Ground for Archival Integrity
- Points of Contact: Examine the barrier. Has a proper sizing (ideally PVA) been applied to completely seal the canvas fibers from all subsequent paint and primer layers? This is the first line of defense.
- Collecte: Inventory the ground layers. Document every layer applied to the support: the type of size used, the number of primer coats, and the specific primer type (e.g., acrylic gesso, oil ground).
- Cohérence: Confront the absorbency. Does the final surface match your paint’s requirements? A less absorbent oil ground is ideal for luminous glazing, while a gesso ground may be better for direct painting.
- Mémorabilité/Émotion: Assess the mechanical bond. Does the surface have sufficient “tooth” for your paint to adhere to securely? A surface that is too slick can lead to poor adhesion and future flaking.
- Plan d’Intégration: Develop a correction plan. If the test shows the ground is too absorbent, apply an additional, thin coat of primer. If cracking is already an issue, you must re-evaluate your entire sizing and priming process for future works.
When to Wash Your Brushes to Prevent Acrylic Build-Up in the Ferrule?
The principles of craftsmanship extend to the care of one’s tools. A painter’s brush is an extension of their hand, and its condition directly impacts the quality of the work. When applying acrylic-based primers like gesso, meticulous brush hygiene is not just good practice; it is essential to prevent permanent damage. The critical moment for washing is immediate. You must wash your brush with soap and water the very second you finish applying a coat.
Acrylic gesso dries through the evaporation of water, which causes the acrylic polymer particles to fuse together into a hard, inflexible, and water-resistant plastic film. If you allow gesso to dry on the brush, especially up inside the metal band called the ferrule, it will cross-link and harden into a solid mass of plastic. This is irreversible. No amount of solvent will remove it. The bristles will be splayed, the brush will lose its shape and spring, and it will be ruined for any fine work.
For this reason, many seasoned artists use dedicated, less expensive brushes solely for applying gesso. An even more practical approach, especially for oil primers which are difficult to clean, is to use a tool like a Catalyst Wedge. These silicone blades apply primer smoothly and can be wiped completely clean with a paper towel, requiring no solvents and eliminating any risk of the tool being ruined. This meticulous care for one’s tools is a hallmark of the true craftsman, reflecting a deep respect for the entire painting process.
How to Build a Tennis Ball Riser to Kill Kick Drum Vibrations?
While the question of building a tennis ball riser for a kick drum seems to belong in a recording studio, the underlying principle—vibration dampening—is critically important for the archival painter. A finished painting, especially one on a stretched canvas, is a sensitive membrane. It is susceptible to physical shocks and vibrations that can create micro-fractures in the dried paint film, leading to cracking years later. Protecting a wet or dry painting from physical stress is an often-overlooked aspect of archival practice.
Your studio environment plays a role. Working on a solid concrete floor is inherently more stable than on a springy wooden floor. If you must work on a wooden floor, placing high-density foam pads under the legs of your easel can significantly dampen floor vibrations from footfalls or outside traffic. This simple act isolates the artwork from a constant source of low-level stress.
During the act of painting itself, especially on large canvases that have a “drumhead” bounce, the pressure of the brush can cause the canvas to flex. Using a mahlstick—a light stick with a padded ball on the end—to brace your painting hand provides a stable bridge, isolating your hand from the canvas surface. This not only allows for greater control in detailed work but also minimizes the bounce and vibration you impart to the canvas. Thinking like an engineer about isolating your work from physical shock is as important as thinking like a chemist about your materials.
Why Does Brick Absorb Paint Differently Than Concrete?
To fully grasp the critical importance of a properly sealed canvas, it is useful to consider an analogy from the world of architecture: the difference between painting on brick and painting on concrete. A porous, unsealed brick acts like a sponge, wicking the liquid vehicle out of the paint and leaving the pigment on the surface. The result is a dull, chalky, and weak paint film. Smooth, dense concrete, by contrast, is far less absorbent, allowing the paint to form a continuous, durable film with its full intended color and sheen.
Your canvas ground behaves in precisely the same way. A cheap, thinly primed canvas or an improperly sealed one acts like the porous brick. When you apply oil paint, the canvas ground leaches the linseed oil from the pigment, causing the color to look dull and “sunk-in.” This not only ruins the visual effect but also creates a weak, under-bound pigment layer prone to chalking off. Conversely, a well-prepared oil-primed linen canvas acts like the concrete. Its low absorbency surface holds the paint layer on top, allowing the pigment to retain its rich saturation and the oil to form a strong, lustrous, and archival film.
This principle of controlling surface absorbency is everything. A master painter does not leave this to chance. The following table illustrates this direct comparison.
| Surface Type | Absorbency Level | Paint Behavior | Visual Result |
|---|---|---|---|
| Porous Brick / Cheap Pre-primed Canvas | High | Paint sinks in rapidly | Dull, ‘sunk in’ appearance |
| Smooth Concrete / Oil-primed Canvas | Low | Optimizes saturation and fluidity of colors | Luminous, glossy finish |
| Wood Panel | Variable | Requires specialized primers | Depends on preparation |
| Aluminum Composite | None | Needs adhesion promoter | Smooth, contemporary look |
You can—and should—test the absorbency of your own ground. Place a small drop of linseed oil on the surface and time its absorption. If it disappears in under a minute, the surface is too absorbent and needs another layer of primer. A balanced ground will allow the oil to absorb slowly over 2-3 minutes.
Key Takeaways
- Sizing is non-negotiable: Applying a PVA size is the single most important step to chemically isolate canvas fibers from corrosive oil.
- Fiber matters: Linen’s long fibers and natural oils give it superior tensile strength and longevity compared to absorbent cotton.
- Control absorbency: The ground’s job is to prevent oil from sinking in, ensuring paint remains vibrant and the film remains strong.
How to Prevent Your Watercolor Paper From Buckling When Wet?
The familiar problem of watercolor paper buckling when wet provides our final, crucial lesson in canvas preparation. Paper buckles because its cellulose fibers swell when they absorb water, and they do so unevenly, creating hills and valleys. The exact same principle applies to a canvas. When you apply a water-based primer like acrylic gesso, you are introducing a significant amount of water to a tensioned fabric. If the canvas fibers are not properly sealed, they will absorb this water and swell, causing the canvas to slacken, ripple, and buckle.
The solution for paper—stretching it and taping it down—is a direct parallel to the solution for canvas. The first defense is a drum-tight stretch before any liquid is applied. The second, and most important, is proper sizing. As detailed by artists who have perfected the technique, applying two coats of PVA size before priming effectively seals the fibers. The PVA creates a barrier that prevents the water from the gesso from ever reaching the linen or cotton, thus preventing the fibers from swelling. The canvas remains stable and taut throughout the priming process.
This is the primary advantage of modern PVA size over traditional rabbit skin glue. RSG is hygroscopic; it will continue to absorb and release moisture from the air throughout its life, causing the canvas to perpetually tighten and slacken with changes in humidity. A PVA-sized canvas is dimensionally stable. If you do encounter slackness in a pre-primed canvas, you can use the small wooden wedges, or “canvas keys,” provided with the frame to gently expand the corners and re-introduce tension. But the superior method is to prevent the problem from ever occurring by building a stable, properly sized support from the start.
The true mark of a master is not found in the flourish of the final brushstroke, but in the unseen, meticulous labor of the foundation. By embracing the material science of your craft, you are not merely making a picture; you are building an object intended to communicate across centuries. Apply these principles not as restrictive rules, but as a philosophy of craftsmanship to ensure your artistic legacy endures.