In summary:
- Room acoustics are more critical than microphone choice; invest in effective broadband absorption first.
- Stereo miking offers realism, but only if phase coherence is meticulously managed to avoid cancellation.
- Instrument preparation—from new, stretched strings to stable humidity—is a non-negotiable step for professional tuning and tone.
- Compression should surgically control transients, not crush dynamics; use fast-attack and multi-band techniques.
- Every detail at the source, including pick material and thickness, fundamentally alters the recorded transient response.
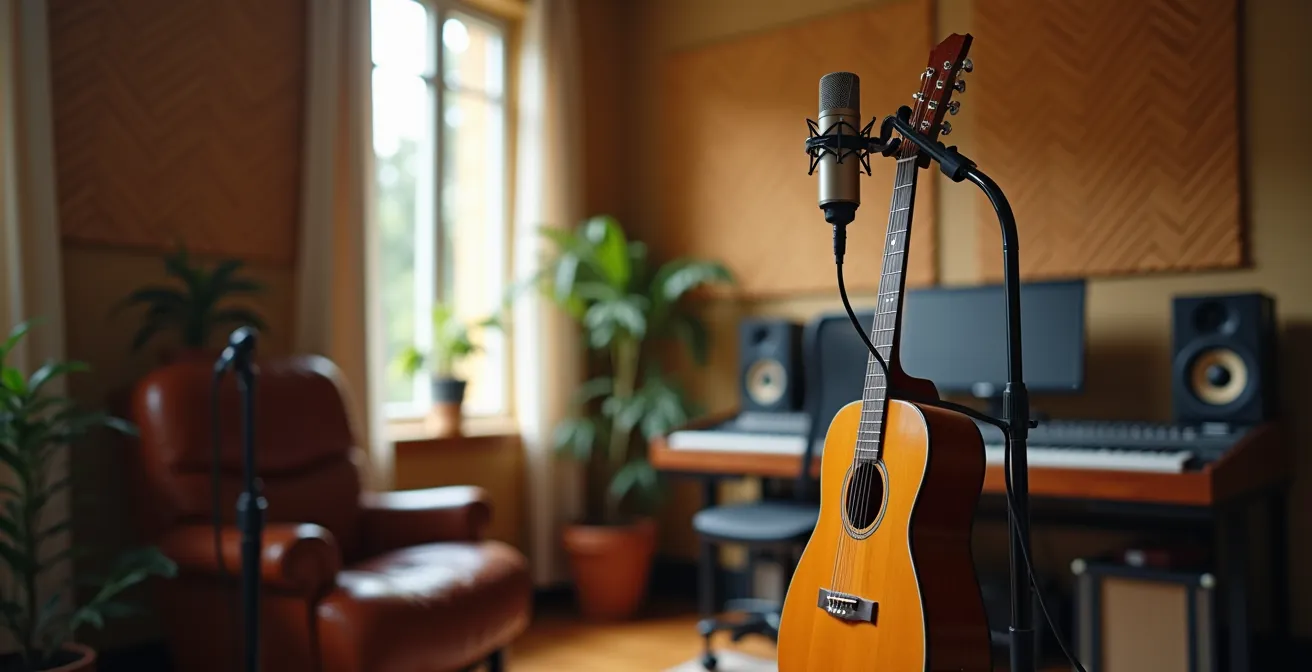
For the home-recording musician, capturing the true sound of an acoustic instrument is the ultimate challenge. You invest in a quality microphone, place it in front of your guitar, and the playback reveals a sound that is disappointingly “boxy,” thin, or clouded in a small-room echo. This frustrating gap between the instrument’s rich, in-person tone and its recorded counterpart is a universal problem. The common advice is to buy an even more expensive microphone or cover your walls in thin foam squares, yet these solutions rarely address the root cause.
The truth is that a pristine acoustic recording is not the product of a single piece of magic-bullet gear. It is the result of systemic integrity. It’s a chain of custody for sound, where every link—from the humidity of the guitar’s wood and the material of your pick, to the precise angle of your microphones and the settings on your compressor—must be optimized. The boxiness you hear is a symptom of uncontrolled low-mid frequency resonance and phase incoherence, enemies that must be defeated at the source, not just masked later with EQ.
This guide abandons the gear-first platitudes. Instead, we will adopt the mindset of an audio engineer, focusing on the physics of sound and the critical control points in the recording chain. We will dissect how to manage your environment, prepare your instrument for microscopic stability, and make precise technical choices that preserve the dynamic life and nuance of your performance. It’s time to stop fighting your room and start building a system that captures sound with absolute clarity.
To navigate this engineering-focused approach, this guide is structured to address every critical control point. We’ll move from microphone theory and source tone all the way to room acoustics and budget philosophy, providing a complete framework for eliminating boxiness forever.
Summary: A Systematic Guide to Eliminating Acoustic Boxiness
- Mono or Stereo: Which Mic Setup Captures the Most Realism?
- Why Does Changing Your Pick Alter Your Acoustic Tone so Drastically?
- How to Prep an Acoustic Guitar for the Studio to Avoid Tuning Issues?
- The Compression Mistake That Kills the Dynamic Life of Acoustic Tracks
- When Is the Best Time of Day to Record Wooden Instruments?
- The Acoustic Treatment Mistake That Ruins Expensive Microphone Quality
- How to Properly Use a Case Humidifier Without Over-Watering?
- Home Studio Budget: How to Allocate $1,000 for Maximum Quality?
Mono or Stereo: Which Mic Setup Captures the Most Realism?
The choice between mono and stereo miking is a fundamental decision of realism versus focus. A single microphone (mono) provides a tight, focused, and phase-perfect sound that sits easily in a dense mix. It’s the workhorse of pop and rock production. However, for a solo folk artist or classical musician, stereo recording is often the key to capturing the immersive, three-dimensional experience of listening to an instrument in a room. The crucial trade-off is the immediate risk of phase cancellation, where sound waves arriving at two microphones at slightly different times cancel each other out, resulting in a thin, hollow sound—especially when the stereo track is collapsed to mono.
To achieve a wide yet phase-coherent stereo image, the X-Y technique is the most reliable starting point. It involves placing two cardioid microphones with their capsules as close as possible, angled apart. For acoustic guitar, studies show that the optimal angle for X-Y stereo miking ranges from 90 to 120 degrees, capturing a realistic stereo spread with minimal phase issues. Another advanced but powerful option is the Mid-Side (M/S) technique, which combines a forward-facing cardioid mic (Mid) with a perpendicular figure-8 mic (Side).
The M/S setup, as illustrated above, offers the ultimate flexibility. It records to two channels but allows you to adjust the stereo width *after* recording, from pure mono (using only the Mid channel) to super-wide stereo, all while maintaining perfect mono-compatibility. For spaced-pair techniques (like one mic on the 12th fret and one near the bridge), the “3:1 Rule” is non-negotiable to prevent phase issues: the distance between the two microphones must be at least three times the distance from each microphone to the guitar. This ensures the time-of-arrival differences are significant enough to be perceived as spaciousness rather than destructive interference.
Why Does Changing Your Pick Alter Your Acoustic Tone so Drastically?
An acoustic guitar’s sound begins the exact moment the pick strikes the string. This initial impact, known as the transient, contains a massive amount of high-frequency energy and defines the attack and clarity of every note. Many musicians obsess over wood types and string gauges but overlook the single most influential tool for shaping this transient: the plectrum. The pick’s material and thickness fundamentally alter the instrument’s tone because they dictate the acoustic impedance match—or mismatch—with the string.
A thin, flexible nylon pick bends on impact, absorbing some of the high-frequency energy and producing a softer, warmer, more rounded transient. Conversely, a thick, rigid Ultex pick transfers energy almost instantly, creating a sharp, bright, and defined attack with prominent upper-mid frequencies. This isn’t a matter of “better” or “worse,” but of deliberate tonal sculpting. A harsh, clicky recording is often not a microphone problem, but a pick problem. The pick is your first stage of EQ and compression.
Case Study: Taming Harsh Transients at the Source
Studio engineers frequently encounter acoustic tracks with overly sharp, unpleasant pick noise. In one documented instance, an engineer found that simply switching the guitarist from a standard hard plastic pick to a softer nylon pick dramatically reduced the problematic transients. Combined with Elixir NanoWeb coated strings, which also have a slightly gentler attack, the change eliminated the need for aggressive de-essing or dynamic EQ in the mix, preserving a more natural sound.
Understanding these properties allows you to choose a pick as a specific tonal tool. If your recording sounds too thin and aggressive, try a thicker nylon pick. If it sounds dull and lacks definition, an Ultex or Tortex pick might be the solution. As this comparative analysis shows, each material has a predictable sonic signature.
| Pick Material | Thickness Range | Transient Character | Frequency Emphasis |
|---|---|---|---|
| Nylon | 0.38-1.14mm | Soft, rounded attack | Warm mids, reduced highs |
| Tortex | 0.50-1.50mm | Balanced, controlled | Even frequency response |
| Ultex | 0.73-1.14mm | Sharp, defined | Enhanced upper mids |
| Wood/Stone | 2.0-4.0mm | Natural, organic | Full body, subtle highs |
How to Prep an Acoustic Guitar for the Studio to Avoid Tuning Issues?
Nothing kills the momentum of a recording session faster than an acoustic guitar that refuses to stay in tune. Tuning instability is a sign of a system under physical stress, caused by new strings that haven’t settled, friction at the nut, or the instrument’s wood reacting to changes in temperature and humidity. Preparing the guitar is not an optional preliminary; it’s a mandatory process for ensuring tonal consistency and pitch accuracy from the first take to the last.
The most common error is recording on strings that are too new. Freshly installed strings are still stretching and will constantly go flat. They need to be installed, stretched, and “played in” to achieve stability. This involves manually stretching each string and playing aggressively to accelerate the settling process. Equally critical is environmental acclimation. Wood is a hygroscopic material; it absorbs and releases moisture, causing it to expand and contract. Moving a guitar from a cool, dry case into a warm, humid room without letting it acclimate is a recipe for disaster. As one expert in the Sweetwater Recording Guide emphasizes:
Environmental acclimation is crucial – an acoustic guitar’s wood needs to stabilize to the recording room’s temperature and humidity to prevent tuning shifts during the session.
– Professional recording engineer, Sweetwater Recording Guide
This means allowing the instrument to sit out of its case in the recording space for several hours before the session begins. Finally, friction at the nut is a primary cause of the “pinging” sound you hear when tuning, where a string binds and then jumps in pitch. A tiny amount of graphite from a pencil lead in the nut slots acts as a dry lubricant, allowing strings to move smoothly.
Action Plan: The Professional String Settling Protocol
- Install new strings at least 24 hours before the recording session.
- Tune each string up to pitch, then gently pull it upward at the 12th fret to stretch it.
- Retune and repeat the stretching process 3-4 times for each string until it holds pitch.
- Play aggressively for 10-15 minutes using heavy strumming and bending to finalize the settling.
- Remove the guitar from its case and let it acclimate to the recording room’s temperature and humidity for a minimum of 2-3 hours before recording.
- Apply a small amount of graphite from a pencil lead to the nut slots to ensure smooth string travel.
- Perform a final tuning check using a high-precision strobe tuner immediately before hitting record.
The Compression Mistake That Kills the Dynamic Life of Acoustic Tracks
Compression is the most misunderstood tool in acoustic music production. The common mistake is to apply a single, slow-acting compressor to “even out” the performance. This approach is a blunt instrument that crushes the vital dynamic range of the instrument, squeezing the life out of the track and often accentuating the very “clicky” pick transients you want to control. A professional, transparent approach to acoustic guitar compression is not about overall leveling; it’s a surgical, multi-stage process focused on transient shaping.
The goal is to control the initial peak of the note without affecting the body and decay (the sustain). This is achieved with serial compression. The first compressor in the chain should have an extremely fast attack (0.1-1ms) and a low ratio (2:1). Its sole job is to catch and gently tame only the loudest pick attacks, shaving a mere 1-2dB off the transient peaks. This is not about making the track louder; it’s about creating headroom and reducing harshness at the source of the signal.
After this initial transient control, a second, slower compressor (10-30ms attack) can be used for gentle overall dynamic management. Because the aggressive peaks have already been handled, this compressor can work more smoothly without pumping or clamping down unnaturally. For even more precise control, dynamic EQ or multi-band compression is the engineer’s secret weapon, allowing you to apply compression only to the specific frequencies where harshness lives.
Case Study: Multi-band Compression for Surgical Control
When dealing with harsh pick attacks, mixing engineers often use multi-band compressors like ReaXcomp in a targeted way. Instead of compressing the entire signal, they configure the compressor to act only on frequencies above 2kHz. This allows them to specifically reduce the intensity of the sharp, “clicky” part of the transient without touching the warmth and body of the guitar’s low-mids, resulting in a much smoother and more natural-sounding track.
When Is the Best Time of Day to Record Wooden Instruments?
The ideal recording environment is a silent one, a condition notoriously difficult to achieve in a home studio. Your microphone is not selective; it will capture the nuance of your finger vibrato with the same fidelity as your neighbor’s dog, the rumble of a passing truck, or the hum of your refrigerator. Consequently, the “best” time to record is often dictated by the ambient noise floor of your environment. For most people living in apartments or suburban areas, this time is late at night.
Recording between 11 PM and 4 AM typically offers the lowest level of external noise pollution. Traffic dies down, neighbors are asleep, and household appliances are less likely to be running. This drastic reduction in the ambient noise floor allows you to increase the gain on your microphone preamplifier without also raising the level of background hiss and rumble. This results in a cleaner recording with a better signal-to-noise ratio, giving you more flexibility in the mixing stage. A cleaner source recording can be compressed and processed more aggressively without revealing a layer of distracting background noise.
Beyond just external noise, there’s the factor of internal focus. The quiet and solitude of a late-night session can foster a deeper level of concentration and creative immersion, often leading to better performances. There are fewer distractions from phone calls, emails, or family members. This psychological advantage, combined with the technical benefit of a lower noise floor, creates a powerful window of opportunity for capturing high-quality tracks.

The goal is to find a recurring window of time where your environment is at its most stable and quiet. This requires observation. Spend a few days consciously listening to the sounds of your home at different hours. Learn the schedule of your surroundings and plan your sessions to coincide with its moments of peace. This strategic timing is a form of passive acoustic treatment that costs nothing but delivers significant results.
The Acoustic Treatment Mistake That Ruins Expensive Microphone Quality
The single most destructive mistake in home recording is prioritizing the microphone over the room. A $1,000 microphone in an untreated bedroom will produce a boxy, resonant, and unusable recording. A $100 microphone in a well-treated room can sound professional. The “boxiness” you hear is not a flaw in your microphone; it’s the sound of your room’s low-mid frequency resonances and early reflections smearing the clarity of your instrument.
The common, and tragically ineffective, solution is to buy cheap, thin foam panels online. This is the biggest myth in home acoustics. As the experts at Black Ghost Audio state in their definitive guide:
The black foam acoustic panels that you can buy bundled on Amazon are painfully ineffective… they’re useless for mid to low-end frequency absorption.
– Black Ghost Audio, The Ultimate Acoustic Treatment Guide for Home Studios
This thin foam only absorbs high frequencies, making the room sound dull and lifeless while leaving the muddy 200-500Hz resonances completely untouched. Effective acoustic treatment must be broadband, meaning it absorbs energy across a wide range of frequencies. This requires thickness and density. DIY panels made from materials like Rockwool or Owens Corning 703, at least 4 inches thick, are the industry standard for effective, affordable broadband absorption. Placing these panels at first-reflection points (on the walls to your left, right, and ceiling between you and your monitors) and bass traps in the corners is the correct way to tame a room.
The goal is not to create a completely “dead” anechoic chamber, but to control the reverb time (RT60) of the room. For a recording space, you are aiming for a tight, controlled decay. The industry standard for an optimal recording room targets a reverb time between 0.20 to 0.40 seconds at 1000Hz. This creates a clear, direct sound without the resonant signature of a small, boxy space, allowing the true tone of your instrument to be captured.
How to Properly Use a Case Humidifier Without Over-Watering?
While room acoustics affect the sound during recording, the instrument’s internal environment affects its physical stability and tone 24/7. An acoustic guitar is a delicate system of wood under tension. When the wood becomes too dry, it shrinks, which can lead to a sunken top, sharp fret ends, and even cracks. When it’s too wet, it swells, causing a “tubby” tone, high action, and potential glue joint failure. Maintaining stable humidity is not just about preservation; it’s about ensuring your instrument is in its optimal state for performance and recording.
The industry standard for acoustic instruments is to maintain a stable environment of 45-55% relative humidity. A case humidifier is a simple tool to achieve this, but it’s often used incorrectly. The biggest mistake is “flying blind”—re-wetting the sponge based on feel rather than data. This can easily lead to over-watering, creating a swampy micro-environment inside your case that is just as damaging as dryness.
The only way to use a humidifier with precision is to pair it with a digital hygrometer. These small, inexpensive devices live inside your guitar case and give you an exact, real-time reading of the relative humidity. Your protocol should be simple: check the hygrometer daily, especially during seasonal changes. If the reading drops below 45%, re-wet the humidifier sponge. If it’s within the 45-55% range, leave it alone. If it climbs above 55%, remove the humidifier until the level drops.
This data-driven approach removes all guesswork. You are no longer reacting to a dry sponge; you are proactively managing a stable environment. Keep the case away from direct heat sources like radiators and sunny windows, which can cause rapid fluctuations. Documenting your readings in a log can also help you anticipate seasonal trends and adjust your routine before problems arise. A stable instrument is a reliable instrument, free from the tonal and tuning shifts that plague improperly stored guitars.
Key Takeaways
- Your listening environment is your most important tool. You cannot fix a problem you cannot accurately hear.
- Acoustic treatment is not an expense; it is an investment in accuracy that unlocks the potential of all your other gear.
- The source is everything. A well-prepared, stable instrument recorded with a modest microphone will always sound better than a poorly maintained one recorded with an expensive microphone.
Home Studio Budget: How to Allocate $1,000 for Maximum Quality?
When assembling a home studio on a $1,000 budget, the conventional wisdom is to spend the largest portion on the microphone and audio interface. This approach is fundamentally flawed. It prioritizes the “capture” device while ignoring the two most critical factors that define the quality of your recordings: the acoustic environment you record in, and the monitoring system you use to make decisions. An engineer’s approach inverts this logic entirely, allocating the budget based on impact, not price tag.
The most critical component is your ability to hear accurately. Therefore, the largest portion of your budget should be dedicated to acoustic treatment and monitoring. Without reliable monitoring, you are mixing blind, and your results will not translate to other playback systems. In an untreated room, studio monitors are liars, as the room’s resonances and reflections will distort their frequency response. For a small budget, high-quality open-back headphones are a far more reliable reference point than cheap monitors in a bad room.
This contrarian philosophy dictates that the microphone is actually one of the last places to spend a lot of money. A workhorse dynamic mic like a Shure SM57 or an entry-level condenser like an AT2020, when placed correctly in a well-treated space, can yield stunningly professional results. The money saved on the microphone is reinvested in DIY broadband absorption panels, which will have an infinitely greater impact on eliminating the “boxiness” from your recordings. As one professional engineer puts it, “You cannot fix a problem you can’t accurately hear. The best microphone will still yield a boxy mix if your listening environment is misleading you.”
This optimized budget allocation, detailed in a guide by Black Ghost Audio, prioritizes the foundation of good sound over the superficial allure of expensive gear. It’s a strategy that guarantees the highest possible quality for your investment.
| Category | Traditional Approach | Optimized Approach | Budget % |
|---|---|---|---|
| Acoustic Treatment | $100-200 | $400 (DIY broadband panels) | 40% |
| Monitoring | $200-300 | $300 (open-back headphones) | 30% |
| Microphone | $400-500 | $200 (SM57 or AT2020) | 20% |
| Interface | $200-300 | $100 (Focusrite Solo) | 10% |
By embracing this system-wide philosophy—treating your room, preparing your instrument, and making precise, informed technical choices—you shift from being a gear collector to a sound engineer. Begin today by evaluating the weakest link in your own signal chain and take the first step toward capturing the true, uncompromised sound of your acoustic instrument.